Starting a blog can transform your passion into a platform that reaches thousands of people. Whether you’re sharing your expertise, building a business, or simply expressing yourself, creating a blog is more accessible than ever. This guide walks you through every step of launching your first blog successfully.
Why Start a Blog Today?
Blogging remains one of the most powerful ways to build an online presence. Unlike social media posts that disappear into feeds, your blog content lives permanently on your own digital property. You control the design, monetization, and message without platform restrictions.
People start blogs for various reasons: sharing expertise in their field, documenting personal journeys, building authority in their industry, creating additional income streams, or connecting with like-minded communities. Whatever your motivation, the fundamentals of creating a successful blog remain the same. In this guide, I will show you step-by-step on how I started my blog.
Step 1: Choose Your Blog’s Focus
Before I ever touched the blogging technology, I knew I had to define my blog’s focus. I’ve learned that successful blogs thrive on having a clear purpose and a specific target audience. When I first started, I was totally confused about what I should write about. Eventually, the answer became clear: I must define my niche. That is the essential first step.
Start by asking yourself: What topics could I write about consistently for the next year? What problems can I help people solve? What unique perspective or experience do I bring?
Your niche doesn’t need to be extremely narrow initially, but it should be specific enough that potential readers understand what value you offer. “Travel blog” is vague, but “budget travel tips for solo female travelers in Southeast Asia” immediately tells readers who you’re serving.
Write down three to five main topics you’ll cover regularly. This gives you direction while allowing flexibility as your blog evolves.
Step 2: Select a Blogging Platform
My platform is the foundation of my blog. Several options exist, but I will be sharing you exactly what platform I used: WordPress
WordPress.org powers over 40% of all websites globally. It offers complete control, thousands of themes and plugins, and scales from personal blogs to major publications. You’ll need separate hosting, but the flexibility is unmatched. This is what I recommend for serious bloggers.
WordPress.com provides a hosted version with less control but easier setup. Free plans exist, though custom domains and monetization require paid upgrades.
Step 3: Choose a Domain Name and Web Hosting
Your domain name is your blog’s unique address on the internet—think of it as your digital brand identity. When selecting a domain name for your blog, follow these best practices:
Domain Name Selection Tips:
- Choose something memorable and relevant to your niche
- Keep it short and easy to spell
- Avoid numbers, hyphens, and complex spellings
- Consider including a relevant keyword if possible
For example, my domain is sevenbitluck.com—a name I believe will bring fortune to my blogging journey.
Checking Domain Availability
Finding the perfect domain name takes time, especially since many common dictionary words are already registered. If your first choice isn’t available, it means another website owner has already claimed it.
To check domain availability and register your chosen name, I recommend using Namecheap.com—a reliable domain registrar that offers:
- Easy domain search functionality
- Competitive pricing for domain registration
- Integrated web hosting options
- User-friendly domain management tools
Pro tip: Have 3-5 backup domain names ready in case your first choice is taken. This will save you time during the registration process.
After successful domain registration, you need to find a webhost. A webhost is a company that provides you with storage space for your blog contents where you can store your files and images. I recommend two(2) webhosting providers for your blog: hosting.com and bluehost.com
How Your Domain Name Works
Just think of your domain name like a street address for your house:
Your domain name (www.sevenbitluck.com) = Your blog’s address
When someone types your domain name into their browser:
- They’re asking for directions: The internet looks up where your blog is stored (like using GPS to find a house address)
- They connect to your storage space: Your web hosting is like a filing cabinet that holds all your blog posts, pictures, and pages
- Your content is delivered: The hosting sends your blog content from the storage to their screen
- They see your blog: Your website appears on their device, and they can read your articles!
Simple analogy:
- Your domain name = Your home address (easy to remember)
- Your web hosting = The actual house where everything is stored
- Users = Visitors coming to your house
When visitors type “www.sevenbitluck.com,” they’re basically saying “Take me to this blog!” and the internet delivers your content to them instantly—no technical knowledge needed on their part!
Step 4: Choose a Web Hosting Provider
After registering your domain name, the next step is to select a web hosting provider.
What is Web Hosting?
A web host is a company that provides the storage space and technology needed to make your blog accessible on the internet. Think of it as renting space on a powerful computer (server) that stays online 24/7, storing all your blog posts, images, videos, and files so visitors can access them anytime.
Your domain name is just the address—web hosting is the actual space where your blog “lives.” Without hosting, your domain name would lead nowhere, like having a street address with no house.
Recommended Web Hosting Providers for Beginners:
I recommend these two reliable hosting companies for new bloggers:
- Hostinger.com – Affordable plans starting at low monthly rates, beginner-friendly control panel, and excellent customer support
- Bluehost.com – WordPress-recommended hosting, easy one-click WordPress installation, and free domain name for the first year
- Hosting.com – Best for users who prioritize speed and performance, developers, growing businesses willing to pay more for quality
Now that you’ve registered your domain name and chosen a web hosting provider, it’s time to install WordPress and start building your blog. Most web hosts provide cPanel access, which makes WordPress installation quick and easy—even for complete beginners.
How to Access Your cPanel Dashboard
Your web hosting provider will send you login credentials after you sign up. To access your cPanel:
- Open your web browser
- Type:
www.yourdomainname.com/cpanel(replace “yourdomainname” with your actual domain) - Press Enter
You’ll be directed to the cPanel login page, which should look similar to the image below.
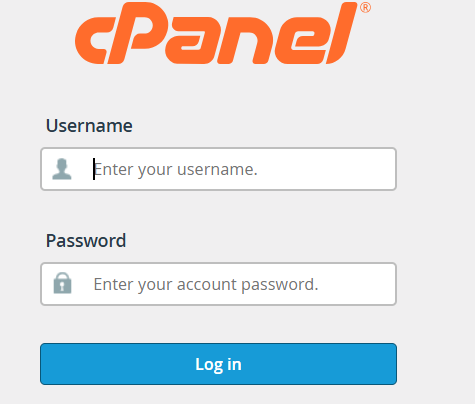
Log Into Your cPanel Account
Enter the username and password provided by your web hosting company in the welcome email. If you can’t find these credentials, check your email spam folder or contact your hosting provider’s support team.
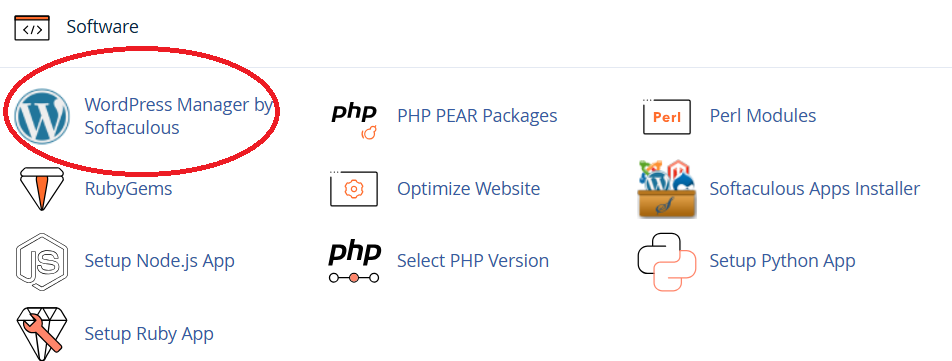
Step 5. Install WordPress Using cPanel
Once you’re logged into cPanel, follow these steps to install WordPress:
- Locate the WordPress installer: Scroll down to find the “WordPress” icon or look for “Softaculous Apps Installer” section
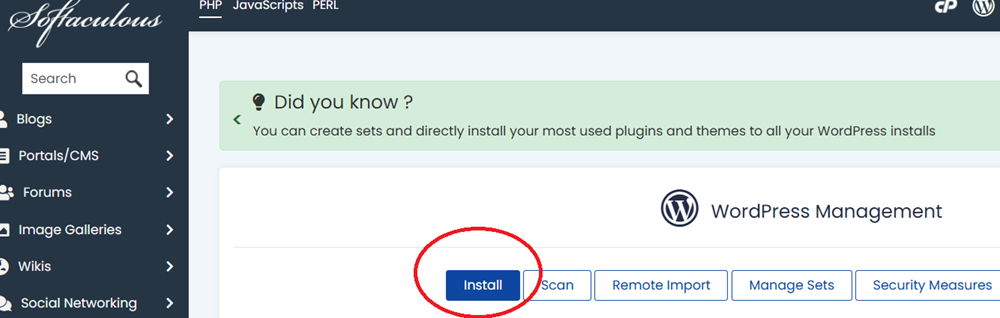
- Click on WordPress: Most hosting providers use one-click WordPress installation tools
- Follow the installation wizard: Fill in your site name, admin username, and password
- Complete the setup: Click “Install” and wait a few minutes for WordPress to be installed
Pro Tip: I recommend you write down your WordPress admin login credentials in a secure location—you’ll need these to access your WordPress dashboard later.
Step 6: Choose and Customize Your Theme
Your theme controls your blog’s appearance. WordPress offers thousands of free and premium themes. For beginners, I recommend starting with free, well-supported themes like Astra, GeneratePress, or Pro Portfolio. These are lightweight, customizable, and work well with page builders if you want more design control later. On this blog, I’m currently running the Pro Portfolio theme. Elegant Themes offers premium WordPress themes with beautiful designs and a solid reputation in theme development.